I'm sorry I haven't been around for a while, I haven't been crafting much. Well except for some forays into felting, but the kiln has been cold. I had a guest staying in my craft room then we moved a mattress into my craft room so DH and I could stay there while we had a guest in the bedroom, then I went crazy, then I went to graduate school, and now I'm moving to Seattle. Things will be slow during the move. But I'll try to post a bit about learning to felt. So far it has been fun.
Tuesday, October 1, 2013

Sunday, June 30, 2013
broken glass
Just a note on my last project. Even though I let the mold dry for a long, long time it still exploded in the kiln. I learned that I should allow the kiln to heat slowly, I had the setting on fast, my bad. Oh well, I'll try again later. Right now I'm doing my broken glass experiments.

 I'm breaking glass into small bits, not too small because it doesn't melt right. So I got my glass and I broke it into smallish pieces. I put the pieces into a terracotta tray I had coated with kiln wash. (another thing I wasn't sure I did right... we'll see.) But I set up the kiln with a schedule I got from Glass With a Past I know she has a better kiln than I have, but I'm trying her schedule as a way to start. I will make adjustments if it doesn't work. But here is the schedule. "300/hr to 1100 hold 10 (this stop makes sure your mold and glass are all the same temperature) 300/hr to 1650 hold 20 9999 to 1020 hold 10 (annealing stop) 200/hr to 750 then off"
I'll try to remember to post pics when I'm done. Lets hope what I did isn't rubbish.

 I'm breaking glass into small bits, not too small because it doesn't melt right. So I got my glass and I broke it into smallish pieces. I put the pieces into a terracotta tray I had coated with kiln wash. (another thing I wasn't sure I did right... we'll see.) But I set up the kiln with a schedule I got from Glass With a Past I know she has a better kiln than I have, but I'm trying her schedule as a way to start. I will make adjustments if it doesn't work. But here is the schedule. "300/hr to 1100 hold 10 (this stop makes sure your mold and glass are all the same temperature) 300/hr to 1650 hold 20 9999 to 1020 hold 10 (annealing stop) 200/hr to 750 then off"
 I'll try to remember to post pics when I'm done. Lets hope what I did isn't rubbish.
Sunday, March 31, 2013
So I'm starting to work harder on my recycled glass. I joined the Glass Art Guild Guild of Utah. I think it will be a wonderful resource for me. One of the bloggers I love Glass With A Past is here in Utah and she had a lot of good info to share She had us make a clay tile that we will use to carve our glass with. She also does glass carving with glass fiber paper, but thicker. Or thinner, depending on the glass fiber you use. What ever, it is interesting and beautiful. I got some so I can try it myself.
The thing is I've got somebody staying in my craft room and I feel really bad asking her to give up her privacy of the craft room so I can use my kiln. The problem is that the fuse fails because the kiln draws to much power. So she can't run the computer or the lights or anything else. It is quite dull in there while the kiln is running.
But I bought some clay and I'm making some molds:


The thing is I've got somebody staying in my craft room and I feel really bad asking her to give up her privacy of the craft room so I can use my kiln. The problem is that the fuse fails because the kiln draws to much power. So she can't run the computer or the lights or anything else. It is quite dull in there while the kiln is running.
But I bought some clay and I'm making some molds:


I'm going with abstract right now, because I'm still figuring out what the recycled glass is going to do. I completely screwed up my pot melt project. It totally devertrafied. But looking at examples of other peoples work with recycled glass, I think I can work with the devertrarfication. I'm not sure what I'm going to do with the glass, I've had a few ideas, but I'm not sure if any of them are good ones. I know can get some glow in the dark power I can mix with it. I think that would make a great effect. I could figure out how to make a split mold, Maybe I could make a glow in the dark Cthulhu. I think that might be beyond my skill level. I have some reliefs of space invaders I could make glow in the dark space invaders. I need to get a bag that I can use to crush the glass in. I can't use a thin plastic bag that the glass can cut it's way through, I can't use a paper bag for the same reason, I don't want to use cloth bag because the it will hold and catch the glass in its fibers. So I'm going look for a large silicone bag or something something like that. Ron suggested I look in a sporting goods store. I don't know I guess its a good start. I get my bag, I get my mallet and go to crazy on my ruined recycled tests. It'll be great.
Monday, March 11, 2013
Been off my game
I haven't done any crafting lately because we have been letting a friend stay in my craft room. I started a pot melt project tonight I hope I don't cook her out of her room. It does get kinda warm when I melt glass.
I'm doing a pot melt. I've got some glass that is just being wasted because it didn't do what I wanted it to when I first slumped it. Now I'm melting it in a terracotta pot and on to some thin fire paper. It should turn out to be sort of a rectangle of melted glass. People do pot melts to mix beautiful colors and create lovely effects. I would like to do that, but I'm still just trying things out so I'm not going to waste good glass on the project.
I didn't take any pictures. I didn't think anything I did was picture worthy. First thing I did was cut my glass into smaller pieces. Next I loaded them up in my terracotta pot and put the pot on three kiln posts to lift it above my kiln shelf. I set the kiln at the levels that were recommended and hit start.
About forty minutes into the project I realized that my set up wouldn't work for a pot melt and I went in to change it. I put on my heat resistant glove and laid the kiln posts on their sides and put the pot back on. I next realized that there was a chance that the glass would stick to the kiln post so I put some thin fire paper on top of them. Now I think the thin fire paper is too close to the pot, but I also learned that my kiln is at a level where my heat resistant gloves don't work so well. They work, I would hate to feel the heat from the pot without the glove, but it was warm enough that I'm going to leave well enough alone.
We'll see what happens, this guy is going to learn to fly or hit the ground.
Thursday, January 24, 2013
Jump Drive Jewelry
I'm sorry about that. I spent two weeks of that time being crazy so the only crafting I was able to do was under the direct supervision of a rec therapist. Yay! I did make a cute frog out of clay.

So when I got out I was inspired to make some more clay art. I got out my clay and got to work.
This first one is for the dork in all of us:

The next three are special, I made them to house small jump drives. They are all necklaces so you can wear your data where ever you go. I don't know, I think it is a good concept. I hope other people will like it, too


I got busy with my glass again today. I set the Coke bottles aside, I'm going to have to decide what to do with their ruined remains and I'm going to have to look into how I don't get the paint to burn off. I think a lower heat or changing the soak times would work, but I'm not sure.
We got a heat gun and I was excited to try it on my labels. I had read that that was the best way to get them off. It worked great, except that it left an gluey film behind. I tried all the home remedies I could, nail polish remover, alcohol, cooking oil, lotion, re-heating the glue and scraping it off while it was hot.... Yeah, they were all failures. So I got some adhesive remover. Rubbed a little bit on the bottle, waited 30 seconds, and wiped it off with a paper towel. I came off right away. It did leave an oily film that I had to wash with soapy water, but all in all I think it took less than 6 minutes for the labels to be completely removed. And it will go faster when I figure out a system.
For now I'm just going to lumber along.
The cutting of the bottle I was using for my project cut very well at first, better than all the other cuts I made, but while I was using my tool to cut another line on the bottom the glass broke of two smaller pieces. I wasn't able to cut the bottom into the size I wanted, so I won't be getting a square with the bottle, but it should be interesting.
I think I over crowded the kiln:

I'm afraid the glass might melt together, but that will give me an interesting outcome to use my imagination to make useful. I've got a stack of slumped glass that is just waiting for a second chance. That's the good thing about working with recycled glass, you can always try again and see what comes out next.
Those are all the products I used and I would highly recommend them.
Wednesday, December 26, 2012
Getting ready to Etsy
I've cleaned up my craft room only to start make a mess again that same day. I need to get into the habit of putting things away when I go in there instead of just dumping them on the floor.
I finished photographing my coasters. I used a slightly different method than the one I posted awhile back. I don't know if I'm going to update my entry or make a new entry and put a link to the better way of doing it on the original entry. Choices, choices.. I'm just not in the picking mood.
Here is my coasters:


As you can see, I added felt to the back instead of the little feet. I also sprayed them down with varnish to give them a shiny but non tacky feeling on the top. On the original one I did the little feet got stuck on the tacky modpoge and split apart leaving a residue on the top of the coaster. I also used it to test out the varnish originally. I found out then you needed a layer of modpoge over the top or the paper that is on there starts to wrinkle and the coaster is wasted.
I finished photographing my coasters. I used a slightly different method than the one I posted awhile back. I don't know if I'm going to update my entry or make a new entry and put a link to the better way of doing it on the original entry. Choices, choices.. I'm just not in the picking mood.
Here is my coasters:


As you can see, I added felt to the back instead of the little feet. I also sprayed them down with varnish to give them a shiny but non tacky feeling on the top. On the original one I did the little feet got stuck on the tacky modpoge and split apart leaving a residue on the top of the coaster. I also used it to test out the varnish originally. I found out then you needed a layer of modpoge over the top or the paper that is on there starts to wrinkle and the coaster is wasted.
Saturday, December 22, 2012
Sorry I haven't been around
I've been sick for the last little bit so I didn't really feel up crafting much.
I also have to clean up my craft room again. I've been picking up supplies and just dumping them on the floor in there.
I got some material that I'm going to use to make these wrist cuffs that my sister and I worked on last summer.

I'm going to be using reclaimed jeans as the ruffly base cuff. The top part is going to be made from the material that I bought. I got some cute daisy buttons and the hair bands that loop around the wrist and other button. And I have the pin backings for whatever I decide to make out of polymer clay to go in the middle.
I've done some other project with polymer clay I've made a companion cube pendant and I'm currently working on a Cthulhu- well I was before I got sick... I'll post pictures when it is closer to being done. I've also been saving up bottle caps to make into clay pendants.
It's the ADD, my focus has jumped away from slumping glass for the moment. But I'm going to be joining the Utah Glass Worker's Guild in January so I think that will get my excitement up again.
I need to buy kiln wash before I can move forward with it so there is still some waiting involved either I get it through the mail or wait until my husband and I feel up to driving to Layton. That is if the store in Layton even has it, they are shifting their focus away from glass and more towards pottery. I don't know, do you use kiln wash for pottery?
But for my current project I need to find out if my sewing machine works. I got it for $15 at Deseret Industries I haven't figured out its threading system so I haven't actually tried it out on any material. I know the needle goes up and down and that is a good sign, but we'll see. I also don't know if it has a button hole setting. It is old, but I don't think it's that old.
We'll see.

I'm going to be using reclaimed jeans as the ruffly base cuff. The top part is going to be made from the material that I bought. I got some cute daisy buttons and the hair bands that loop around the wrist and other button. And I have the pin backings for whatever I decide to make out of polymer clay to go in the middle.
I've done some other project with polymer clay I've made a companion cube pendant and I'm currently working on a Cthulhu- well I was before I got sick... I'll post pictures when it is closer to being done. I've also been saving up bottle caps to make into clay pendants.
It's the ADD, my focus has jumped away from slumping glass for the moment. But I'm going to be joining the Utah Glass Worker's Guild in January so I think that will get my excitement up again.
I need to buy kiln wash before I can move forward with it so there is still some waiting involved either I get it through the mail or wait until my husband and I feel up to driving to Layton. That is if the store in Layton even has it, they are shifting their focus away from glass and more towards pottery. I don't know, do you use kiln wash for pottery?
But for my current project I need to find out if my sewing machine works. I got it for $15 at Deseret Industries I haven't figured out its threading system so I haven't actually tried it out on any material. I know the needle goes up and down and that is a good sign, but we'll see. I also don't know if it has a button hole setting. It is old, but I don't think it's that old.
We'll see.
Sunday, December 16, 2012
It is better than it has been
So my bottle is all slumpy.
It has some air bubbles, there are air bubbles, I've found sites that give me ideas of how to reduce the chance of getting air bubbles, but I think that the glass marble might have been some of the problem.
The thing I have now is that I don't have the imagination to envision what to do with it next. The marble is raised some, but flattened on the bottom. It is interesting. But it's just a flattened bottle. Do I want to make it a spoon rest? Do I want to make it a wind chime?

I guess it is going to sit on a shelf while I make up my mind. It might have a few problem areas, but I think it deserves better than that.
Saturday, December 15, 2012
My Ramune Project
I think I talked about how the blue glass project didn't work out. I had it on a soft fuse program and it didn't slump down like I had hoped. I'm not going to post the the firing schedule, because it wasn't right. But when I do find the right schedule, I will post it.
Here is what they turned out to look like:

See, not what I had hoped for at all. The only thing that I can take away from this is that on the lighter blue one it did close up the broken hole and the glass kept it's color so it isn't just going to burn off.
First I pulled off the label, it was surprisingly easy and I was happy.
Next I moved onto the the plastic top. OMG, was that a bitch. I took at it with scissors, a screwdriver, and a knife. To no avail. Next I turned to the most potent tool of all, the internet.
I found a video that instructed me to thin out with a lighter and a knife. When it was thin enough, and that was left open, I was to go at it with needle nose pliers and just twist it off. Sounded easy enough. Except I didn't have a knife that was small enough and up to the task. The knife I was using before was a huge stabby knife you use to kill people with when you are wearing a hockey mask. I can't remember what it is called right now. So instead I used the scissors.
Several attempts I didn't get it thin enough, twice I got hot, melted plastic on my skin (yes, it blistered), and finally I was able to get it off. *insert triumphant music*
Here is what it looks like ready to fire:

You can't really see the marble in that pic, but you can see the unusual shape of the bottle.
I put it on a full fuse schedule. It is a hotter, longer one than I'm used to, so I guess I'll see how that turns out. It will take 17 hours, instead of the usual 8 hours.
Here is what they turned out to look like:

See, not what I had hoped for at all. The only thing that I can take away from this is that on the lighter blue one it did close up the broken hole and the glass kept it's color so it isn't just going to burn off.
I'm slumping a bottle tonight.
It is a Ramune bottle. For those of you not in the know, it is an Asian (I know how racist of me) drink with a marble sealing the soda. You use a plunger lid to pop the marble into the bottle's neck. It has a thick blue plastic top to hold the marble in.
First I pulled off the label, it was surprisingly easy and I was happy.
Next I moved onto the the plastic top. OMG, was that a bitch. I took at it with scissors, a screwdriver, and a knife. To no avail. Next I turned to the most potent tool of all, the internet.
I found a video that instructed me to thin out with a lighter and a knife. When it was thin enough, and that was left open, I was to go at it with needle nose pliers and just twist it off. Sounded easy enough. Except I didn't have a knife that was small enough and up to the task. The knife I was using before was a huge stabby knife you use to kill people with when you are wearing a hockey mask. I can't remember what it is called right now. So instead I used the scissors.
Several attempts I didn't get it thin enough, twice I got hot, melted plastic on my skin (yes, it blistered), and finally I was able to get it off. *insert triumphant music*
Here is what it looks like ready to fire:

You can't really see the marble in that pic, but you can see the unusual shape of the bottle.
I put it on a full fuse schedule. It is a hotter, longer one than I'm used to, so I guess I'll see how that turns out. It will take 17 hours, instead of the usual 8 hours.
Thursday, December 13, 2012
I did well... I think
I had the Christmas boutique today. Because I sold items that I had made so long ago, I don't really know if I made a profit or not. I sold $90 worth, and donated $10 to the school.
I was going to take a picture of my booth to post, but it took me so long to set up that the boutique started to soon after. My table was too small for all my stuff. I was going to sell some of my sister's baby carriers for her, but there was just no room for me to put them on the table. Also she left them in the car and didn't have the motivation to go back outside and get them.
My sister was demonstrating some essential oils for treating symptoms of autism and ADHD. She got a lot of interest, but only one sale.
She gave me some oils meant to help clear up my face. One is a foaming face wash and the other is a topical treatment.
So I'm going to give it a try and see if it helps. Here is a before pic, we'll see in a month (or so) how well it works.

I was going to take a picture of my booth to post, but it took me so long to set up that the boutique started to soon after. My table was too small for all my stuff. I was going to sell some of my sister's baby carriers for her, but there was just no room for me to put them on the table. Also she left them in the car and didn't have the motivation to go back outside and get them.
My sister was demonstrating some essential oils for treating symptoms of autism and ADHD. She got a lot of interest, but only one sale.
She gave me some oils meant to help clear up my face. One is a foaming face wash and the other is a topical treatment.
So I'm going to give it a try and see if it helps. Here is a before pic, we'll see in a month (or so) how well it works.

Wednesday, December 12, 2012
Cutting and messing up
OK. I'm going to try some recycled glass bangles now. I have a blue vase/cup? that I picked up from a local thrift store for $0.50. I made sure that it was big enough to fit over my hand and now I'm cutting it into smaller pieces to make the bracelets from.
I got this new toy called the G2 Bottle Cutter. I'm trying it out for the first time.
I was able to make a nice even score, and I haven't been able to do that by hand.

It did scratch off a little of the paint, but I don't think that will end up being a big deal.
Sadly after doing the breaking process the cut didn't come out evenly. I don't know if it was my fault, or the glass's.

The second try came out even worse, I'm not going to add a picture of that because I just don't feel like it, so bla.
I guess all there is left to see is how it will turn out after firing. I'm not going to cut the glass anymore because I don't want to go through the breaking process again and it is so uneven that it would just be a chore to cut it some more. I'm just going to see how it fires and decide what I'm going to do with the excess glass when I'm done.
I got this new toy called the G2 Bottle Cutter. I'm trying it out for the first time.
I was able to make a nice even score, and I haven't been able to do that by hand.

It did scratch off a little of the paint, but I don't think that will end up being a big deal.
Sadly after doing the breaking process the cut didn't come out evenly. I don't know if it was my fault, or the glass's.

The second try came out even worse, I'm not going to add a picture of that because I just don't feel like it, so bla.
I guess all there is left to see is how it will turn out after firing. I'm not going to cut the glass anymore because I don't want to go through the breaking process again and it is so uneven that it would just be a chore to cut it some more. I'm just going to see how it fires and decide what I'm going to do with the excess glass when I'm done.
Monday, December 10, 2012
I'm getting better!
I finished my fourth shirt. It is more centered and on the right spot on my chest.
So I'm getting better...
Well except you know about the emulsion sheet from last night. :-(

So I'm getting better...
Well except you know about the emulsion sheet from last night. :-(

Nothing important
*Sad face*
I ruined a:
Yudu emulsion sheet
because I forgot to take the protective cover off before I exposed it.
I am almost finished doing my coasters. I'm still trying to decide what to charge for them. I'm thinking $8. I figured out the cost and it costs $1.70 to make a group of four so I think $8 for four might be asking a little too much, but when I look at Etsy I see people charging $20 for them. Aaaaa, yikes.
I'm talking about groups of four. I haven't seen anyone sell singles.
I'm doing 3 coats of Mod Podge Mod Podge CS11272 Mod Podge Satin Finish (Google Affiliate Ad) instead of just one so I guess I should change my instructions. But I'll have a good variety to sell at the boutique.
Almost time.
I ruined a:
Yudu emulsion sheet
because I forgot to take the protective cover off before I exposed it.
I am almost finished doing my coasters. I'm still trying to decide what to charge for them. I'm thinking $8. I figured out the cost and it costs $1.70 to make a group of four so I think $8 for four might be asking a little too much, but when I look at Etsy I see people charging $20 for them. Aaaaa, yikes.
I'm talking about groups of four. I haven't seen anyone sell singles.
I'm doing 3 coats of Mod Podge Mod Podge CS11272 Mod Podge Satin Finish (Google Affiliate Ad) instead of just one so I guess I should change my instructions. But I'll have a good variety to sell at the boutique.
Almost time.
Saturday, December 8, 2012
Yea! Coasters
So I'm making the coasters now, and I think I've gotten down how I'm going to make them.
 Palace Ceramic Decorators Tile/ coaster (Google Affiliate Ad)
I start with a white tile. $0.16 at the Home Depot.

Next I get a decorated contact paper. (Dollar store buy) Or I could use scrap booking paper. I cut the paper to 3 1/2" but you can cut any size.
 Kittrich Corporation KIT9995 Contact Paper Rolls 18X25 Yd Clear (Google Affiliate Ad)
I place the contact paper and coat it with Mod Podge and let it dry.

On the other side I place anti-slide "feet".

I use the anti-slide shelf paper from the dollar store.

I cut out little circles.

I cut the back of the tile with the Mod Podge to make it smooth and I glue the feet on that way. Again I let it dry. All done!

I start with a white tile. $0.16 at the Home Depot.

Next I get a decorated contact paper. (Dollar store buy) Or I could use scrap booking paper. I cut the paper to 3 1/2" but you can cut any size.

I place the contact paper and coat it with Mod Podge and let it dry.

On the other side I place anti-slide "feet".

I use the anti-slide shelf paper from the dollar store.

I cut out little circles.

I cut the back of the tile with the Mod Podge to make it smooth and I glue the feet on that way. Again I let it dry. All done!
Friday, December 7, 2012
Last try for now, moving on to easier things.
So I'm getting closer I think.
 I did the four baby food jars and they didn't slump completely flat, they had the raised curved edge I'm looking for, but the way they slumped was all chaotic.


I'm not sure if it is because I'm using too much glass or what. The tutorials I've looked at showed me a nice even rounded shape when they did the slumping, but they were using the necks of bottles not baby food jars.

So I'm going to take a break from trying to slump glass. I've got a bottle cutter coming to me soon, and that will make it easier to cut the bottles with a smooth edge. I'll go back to glass work when that comes.

Right now I'm focusing on getting into making objects to sell at the boutique on Monday.
Yikes, its on Monday. I've got to get busy this weekend. I've got some jewelry made, I'm making some coasters.
The coasters are going great. I've gotten most of my supplies at the dollar store so I'm going to be able to make them for very cheap. I got 24 tiles so I can make 6 sets of 4 coasters. On Etsy at least they are selling for a good profit.


I'm not sure if it is because I'm using too much glass or what. The tutorials I've looked at showed me a nice even rounded shape when they did the slumping, but they were using the necks of bottles not baby food jars.

So I'm going to take a break from trying to slump glass. I've got a bottle cutter coming to me soon, and that will make it easier to cut the bottles with a smooth edge. I'll go back to glass work when that comes.

Right now I'm focusing on getting into making objects to sell at the boutique on Monday.
Yikes, its on Monday. I've got to get busy this weekend. I've got some jewelry made, I'm making some coasters.
The coasters are going great. I've gotten most of my supplies at the dollar store so I'm going to be able to make them for very cheap. I got 24 tiles so I can make 6 sets of 4 coasters. On Etsy at least they are selling for a good profit.
Thursday, December 6, 2012
Project one done, now on to #2
Grrrr.

Well I knew that the project wasn't going to turn out, but it didn't turn out as badly as I thought it would.

Still not usable, but not without some learning value.
I definitely know that I let the glass soak too long, because I had the rounded curve I was looking for on two sides of the baby food container.

If I hadn't let it soak quite as long, maybe the rest of it would have stayed up.

I also learned not to mix projects where you want different results. Did I already say that? I wanted a full on flat fuse with the classic bottle, and I wanted a rolled, rounded look for the baby food jars. There was no way I was going to get both at the same time, warm glass just doesn't work that way.
Oh, and yes, I did already say something similar.
So I'm trying with four baby food jars now.

As you can see I didn't do anything to them except take off the labels. I didn't embellish them or anything.
 I'm using a contour fuse for my firing schedule. I'll post the schedule if the results turn out.
Oh and sorry for any formatting issues Blogger is being weird and I'm not in the mood to try and figure it out.

Well I knew that the project wasn't going to turn out, but it didn't turn out as badly as I thought it would.

Still not usable, but not without some learning value.
I definitely know that I let the glass soak too long, because I had the rounded curve I was looking for on two sides of the baby food container.

If I hadn't let it soak quite as long, maybe the rest of it would have stayed up.

I also learned not to mix projects where you want different results. Did I already say that? I wanted a full on flat fuse with the classic bottle, and I wanted a rolled, rounded look for the baby food jars. There was no way I was going to get both at the same time, warm glass just doesn't work that way.
Oh, and yes, I did already say something similar.
So I'm trying with four baby food jars now.

As you can see I didn't do anything to them except take off the labels. I didn't embellish them or anything.

Oh and sorry for any formatting issues Blogger is being weird and I'm not in the mood to try and figure it out.
Wednesday, December 5, 2012
Well I didn't take a picture of it,, because I just left the pieces in the kiln and reset it, but the two didn't slump at all. The bronze and gold got completely ruined.
Oh well, I'm just practicing anyway. I tried another slumping schedule, maybe this one will work. I was going to post pictures and notes about my last slump, but like I said I didn't.
The major note about my last slump is that I only took it up to 1175 degrees and this new one has me taking it to 1475. Big difference.
I don't know if you can see anything in this video. I tried to show the inside of the kiln and how my projects looked at this temp. The kiln temp is at 1475 right now. So the inside of the kiln was bright. I might try again as it is cooling and post that, but if you can't see the classic bottle is fully slumped, but the edges slumped down and it still has the broken shape. I had hoped that the broken edges would slump inward and the broken-ness wouldn't be noticeable. But you know, wish in one hand crap in the other...
No really I'm learning stuff.
The baby food bottle has slumped too far, it is going to come out flat, and that isn't what I'm looking for. I lesson for this one, don't slump the items you want flat with the items you want a lip on.
Actually I didn't want the bottle completely flat either, but, that is how it turned out.
The thing is I don't know enough about glass work yet to know if I should lower the temp or shorten the soak time.
I'm going to experiment tomorrow with a shorter soak time. I'm going to use baby food bottles and try to do a better job cutting it.
The fuse time I used this time was from Big Ceramic Store. They have a lot of useful info. I still have to go over everything they posted.
Oh well, I'm just practicing anyway. I tried another slumping schedule, maybe this one will work. I was going to post pictures and notes about my last slump, but like I said I didn't.
The major note about my last slump is that I only took it up to 1175 degrees and this new one has me taking it to 1475. Big difference.
No really I'm learning stuff.
The baby food bottle has slumped too far, it is going to come out flat, and that isn't what I'm looking for. I lesson for this one, don't slump the items you want flat with the items you want a lip on.
Actually I didn't want the bottle completely flat either, but, that is how it turned out.
The thing is I don't know enough about glass work yet to know if I should lower the temp or shorten the soak time.
I'm going to experiment tomorrow with a shorter soak time. I'm going to use baby food bottles and try to do a better job cutting it.
The fuse time I used this time was from Big Ceramic Store. They have a lot of useful info. I still have to go over everything they posted.
| Segment | Rate | degrees F | Hold | |
| 1 | 500 | 500 | 12 min | |
| 2 | 500 | 750 | 12 min | |
| 3 | 600 | 1100 | 10 min | |
| 4 | 200 | 1300 | 20 min | |
| 5 | 250 | 1475 | 10 min | |
| 6 | 9999 | 1100 | 1 hr | |
| 7 | 500 | 970 | 30 min | |
| 8 | 120 | 750 | 20 | |
| Let kiln cool naturally. It is a longer fuse schedule then I have been doing, so we'll see. I might cut the hold times in half. I don't know. | ||||
Project one (With a hind of insomnia)
So I couldn't sleep last night. Is this what manic feels like? So I decided to be useful and work on a glass project. I had cleaning the bottles, scoring the bottles, and slumping the bottles.
I won't know until the firing cycle is over if the slumping portion worked out, but as for the cleaning and scoring, I didn't do well for my first time.

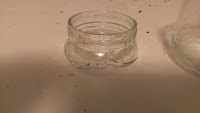
There are plenty of websites that go over ways you can score a bottle, the method I chose for my first time wasn't an efficient method so I won't go over it in the notes.

I added some embellishments an 18k gold surround to the baby bottle, the plan is that is going to be a candle holder, and a bronze star to the bigger bottle, I don't have a plan for what that is going to be; I'm just trying things out.


I'll post pics good or bad. Gotta start somewhere, right?
I'm not sure about my slumping schedule, there are lots of different ones on the net, I'll just keep trying until I find one that works. That is if it doesn't work the first time :-)
I have five cycles for my firing schedule. The kiln automatically goes through the cycles. I don't have to watch it or anything, it is just set and go. (I practically stole this kiln when I bought it for $25.)


There are plenty of websites that go over ways you can score a bottle, the method I chose for my first time wasn't an efficient method so I won't go over it in the notes.

I added some embellishments an 18k gold surround to the baby bottle, the plan is that is going to be a candle holder, and a bronze star to the bigger bottle, I don't have a plan for what that is going to be; I'm just trying things out.

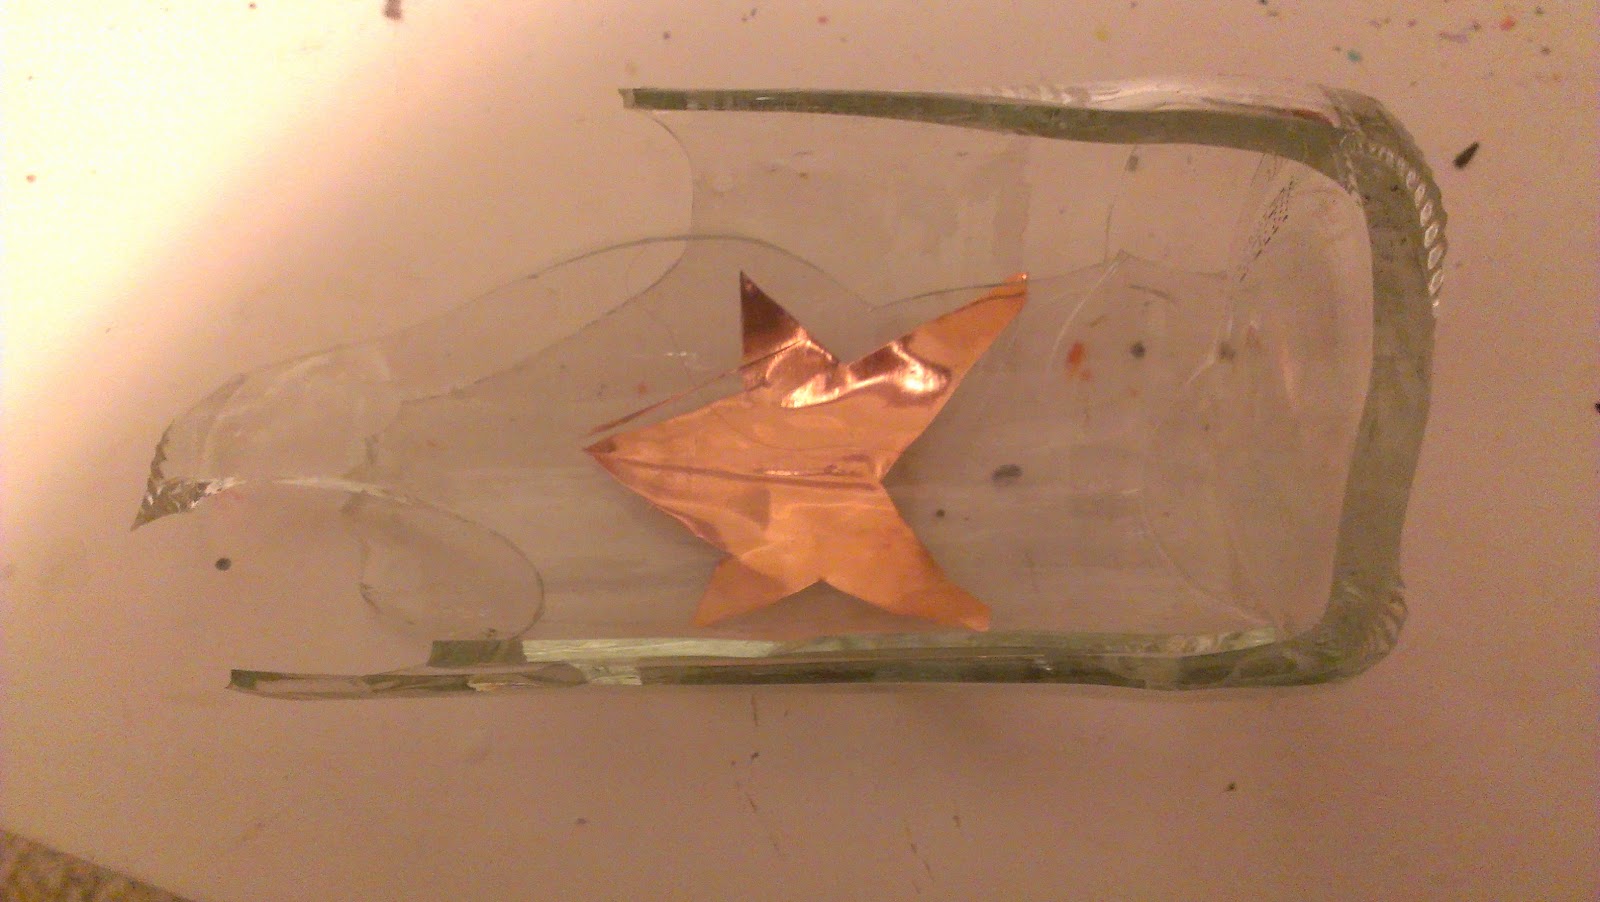
I'll post pics good or bad. Gotta start somewhere, right?

I'm not sure about my slumping schedule, there are lots of different ones on the net, I'll just keep trying until I find one that works. That is if it doesn't work the first time :-)
I have five cycles for my firing schedule. The kiln automatically goes through the cycles. I don't have to watch it or anything, it is just set and go. (I practically stole this kiln when I bought it for $25.)


Subscribe to:
Posts (Atom)
